DEPRECATED - App Verify API - Tutorial: App Verify sample app
This page walks you step-by-step through using Telesign App Verify API in an Android app to verify an end user's phone number by sending a call to the end user's device. The call contains a unique one-time password (OTP) within the caller ID which the app extracts to complete verification automatically.
NOTE:
This sample app only works if you have permission from Google to access call logs.
Before you begin
Ensure that you have the following ready:
- Telesign auth credentials - Customer ID and API key
- Android Studio
- Kotlin plugin
- Android SDK
You will also need to create your own token service.
How it works
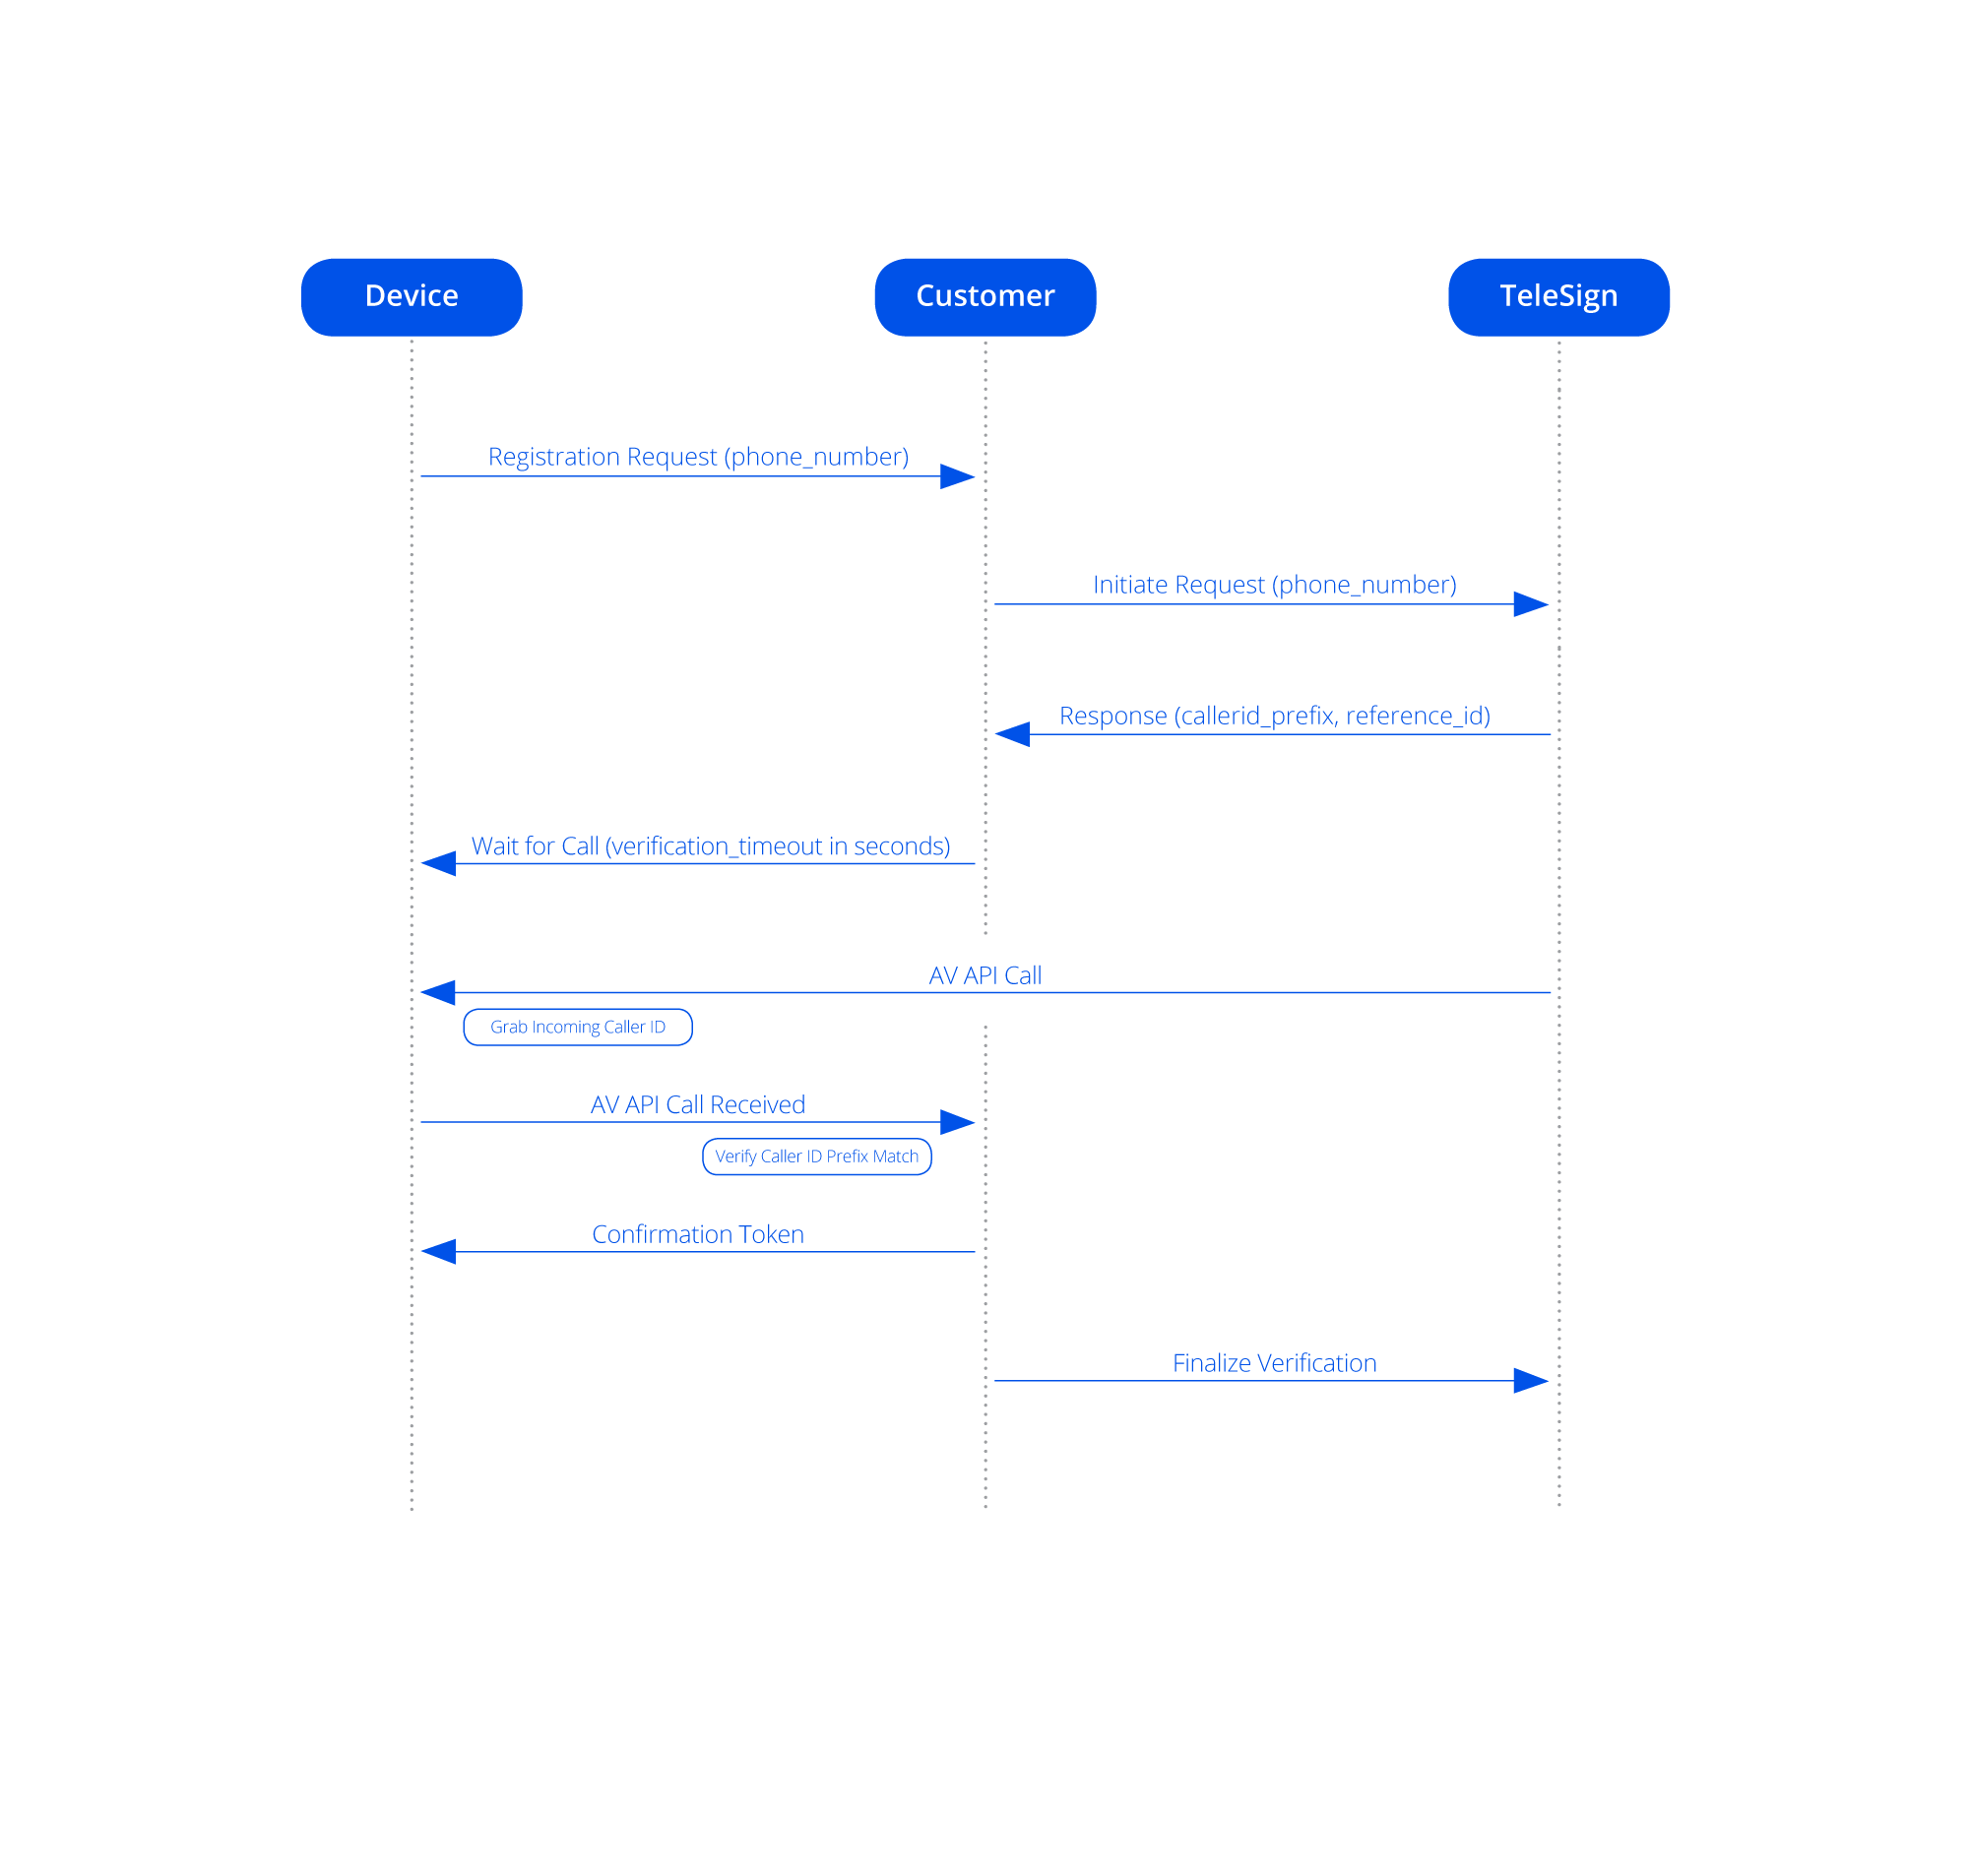
The general workflow for this implementation of the sample application goes like this:
- Registration request (phone_number) - The app on the end user's device gets a token from your server. (JWT application sample code is provided with the sample app. You must create your own server before production.)
- Initiate request (phone_number) / Response (callerid_prefix, reference_id) - Your server contacts Telesign, authenticates using basic or digest authentication, and requests that Telesign initiate App Verify API.
- Response - Telesign responds to your server with the caller ID prefix and reference ID for the transaction.
- Wait for call (verification_timeout in seconds) - The end user's device waits for the call to come in.
- AV call - Telesign makes a verification call to the end user's device.
- Grab incoming caller ID - The app on the end user's device retrieves the OTP code from the caller ID on the incoming call.
- AV call received - The app sends a request to your server, indicating that the call was received, and includes the OTP needed to finalize verification. You will need to build your own API to communicate your app's requests to your server.
- Confirmation token - Your server responds to the app with a confirmation token.
- Finalize verification - The server sends the OTP received from the app to Telesign to finalize verification.
If all goes well, you are verified.

Set up the sample app
This section goes over the basics for setting up the sample app.
- Download or clone the repo from the GitHub repository. This is available upon request to Telesign Customer Support.
- Navigate to src/main/java/com/telesign/avapi/sample.
- Open the MainActivity.kt file.
- Replace the customerID string with your customerID from Telesign.
- Build and run the project.
Designing your app
This section outlines where you can find different parts of the app to learn about design elements to include in your app.
Special permissions
Your app will need to prompt the end user about each permission required for using App Verify API. If the end user chooses not to grant a permission, your app should continue to run, but it will have limited capabilities. Permissions include:
- android.permission.READ_PHONE_STATE - Access TelephonyManager for device and network info
- android.permission.READ_CALL_LOG - Allows application permission to read the incoming caller id
- android.permission.CALL_PHONE - Client Side Termination of voice call
- android.permission.INTERNET - Talk to Telesign backend
- android:name="android.permission.ACCESS_NETWORK_STATE - Check network connectivity
- android.permission.VIBRATE - Vibrate the phone when alerts are received
Helpers
The Helpers folder contains the following:
- Stage.kt - You can read about verification stages and generic handlers used to move between various states in the stages.
- Status.kt - Status codes for the mock server you are using with the sample app.
- Utils.kt - This provides some useful code you may want to include in your app such as:
class Timer- This lets you time various events within your app.fun mkSanitizedPhoneNumber(orginalPhoneNumber: String) String- You can use this to clean up the phone number before trying to use it to make API calls or do verification.vibrateDevice(ctx: Contextx, durationInMilliseconds: Long)- This function helps you handle the phone vibrating for different versions of the Android SDK.
- WebService - This contains information about the mock server included with the sample app.
MainActivity
Be aware of the Country Code Picker - Telesign recommends that you separate choosing country code from entering the phone number. A great way to do that is with a country code picker. This app uses an android library that gives you an easy way to implement it - https://github.com/hbb20/CountryCodePickerProject
Verification
Here you can see two key elements you will need to implement for your sample app -
- JWT service - You can see the JWT endpoint used by Telesign
https://av-api-sample.telesign.com/v1/appverify. You would replace this with your own endpoint where your app can retrieve JWT tokens from. Throughout this section of the code you can functions for how to get JWT tokens, and how the JWT link is constructed. Telesign recommends using a JWT URL that includes your Customer ID. You can see how this is implemented with thegetJWT()function. - Web service URLs - You need a way for your handset to make requests. The requests go to you, and then your server uses Telesign App Verify API to make requests based on what your application requests. The URLs used here should match those of App Verify API. Telesign recommends breaking out the different phases into different endpoints. You will need to construct your own API to have the handset use to make requests.