SMS - Tutorial: iOS mobile app verification
The tutorial walks you step-by-step through integrating a user verification process into a native iOS application using Telesign SMS. The service securely sends an SMS to the end user's device and verifies the number.
Full sample code for this tutorial is available on GitHub. For access, please contact our Customer Support Team.
How it works
At a high level, you send an SMS with a unique URL containing a URI scheme and hostname which are handled using deep links connected to the app's view controller. The URL contains a security code which is extracted and sent for verification when the end user clicks it. Your app also will include a fallback to manual security code entry if automatic extraction isn't possible.
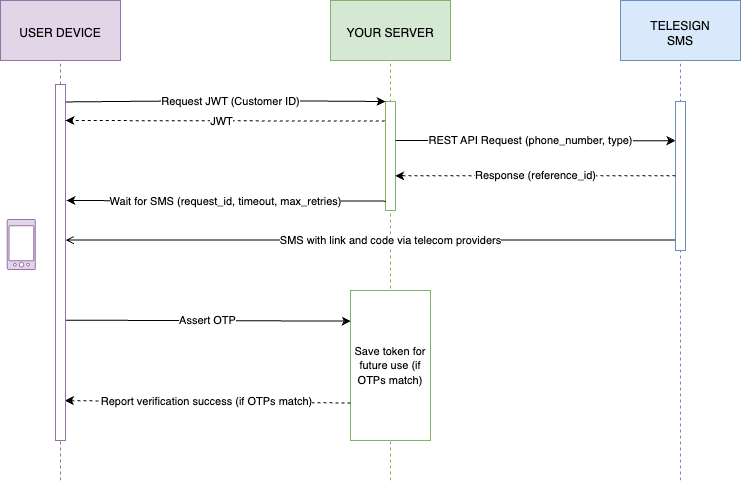
- The end user's device requests a JWT token to be used for authentication with your server.
- Your server returns a JWT token to the device.
- The end user's device sends a registration request using the device's phone number and JWT token to initiate verification.
- Your server sends a request to Telesign that an SMS message containing a verification link be sent to the end user. A response is sent back to your server containing a reference ID for the transaction.
- Telesign sends an SMS to the end user's device.
- The end user clicks the link provided in the SMS.
- An SMS containing the verification code provided in the link is sent to your server.
- You check the code against what you received in the response from your initial request for an SMS message. If confirmed, you verify the end user and save the registration token for future use. Otherwise, you deny verification.
Requirements
To use this tutorial, you need the following:
- Telesign Customer ID and API key
- Swift 4.1 or higher
- iOS 11
Configuration
To configure the sample application for review, do the following:
- Download or clone the repo from GitHub.
- In the Networking folder, open the SessionManager.swift file.
- Replace the customerId string with the one provided by TeleSign.
- Set the build scheme to Production.
- Build and run the project.
Sample app walkthrough
This section quickly walks you through the sample app.
Step 1
- Open the sample app.
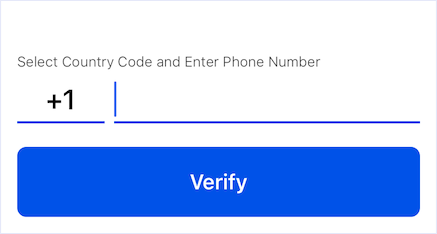
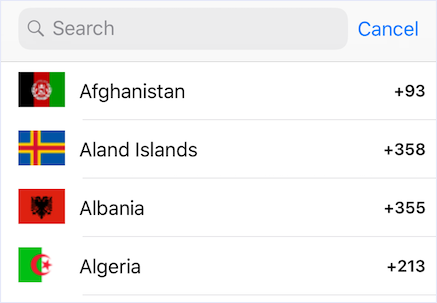
- You are presented with a screen that asks for your phone number. Click on the area for the country code. The country code picker appears. Choose your country. Telesign recommends that your UI collect the country code separate from the rest of the number.
- Enter your phone number.
- Press the Verify button. This starts the process detailed in the How it Works section.
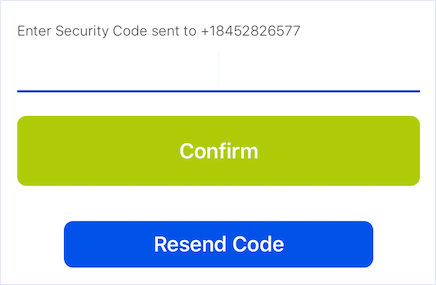
- You are presented with a screen asking you to enter the verification code you receive via SMS at the number you provided. You will be able to enter the code from the SMS you receive, or click the link in the SMS you receive to complete verification. Enter the code.
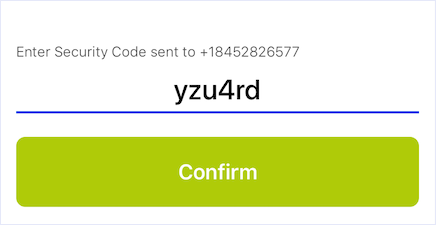
- If you do not receive the code, you can press Resend Code to issue another one. Otherwise, press Confirm
- Here is the screen you should get if all goes well:

Implementing app verification in your own app
This section goes over resources and tips for setting up your own app properly.
Authentication
There are two points in the app where authentication is required. You need to authenticate your end user's app with your servers in order to kick off a request for an SMS, and you need to authenticate between your server and TeleSign in order to successfully send the SMS.
Authenticate Your Application with Your Server
There are a variety of ways you can securely authenticate your application with your server. The sample app uses a JWT service. You can use anything you would like to do this. If you want to do your own JWT service, Telesign provides resources for a sample JWT server you can try out through the application. You cannot use this service in a production environment. You must build your own JWT service. Available Telesign resources for working with JWT include:
Authenticate your server with Telesign
To send a successful request for an SMS, you must authenticate with Telesign and integrate Telesign SMS (part of the Engage API). Authentication methods available for Telesign APIs (used when your server is contacting a Telesign server) include:
Set up the Telesign SMS integration
Check out the following resources to learn how to set up this integration:
Phone number formatting and the country code picker
You should collect the phone number from your end user in a way that forces the correct formatting for the phone number. Make sure you implement with these best practices:
- Request the phone number in your app in a way that does not allow the end user to include special characters or spaces.
- Collect the country code and the rest of the phone number separately.
Telesign provides you with a country code picker, displayed in the sample app. You can review the code for the country code picker in the following areas:
- AppVerifyDemo > View Controllers > CountryCodeViewController.swift
- Country Code Resources folder
- If you want to view code for the Country Code Picker online, you can contact our Customer Support Team to get access to GitHub and see how it is set up.
Verifying with deep links
To verify end users, you must set up your app to use deep links. For mobile apps, deep linking is a way to uniquely identify specific pages or locations in your app. This sample app uses deep links to send your end user a verification code. When the request for an SMS is kicked off, the SMS that goes to the end user's device contains a deep link with the verification code. A response to the request for the SMS goes to your server containing the code that was sent in the link to the end user's device. When the end user clicks the link, the app parses the code from the deep link and sends the code to your server. You then check the code against what's on your server and if they match, you can verify the end user.
To do this using deep links, you need a unique URL for your app. The easiest way to construct unique URLs that will not overlap with other apps, is to base your link off of your apps bundle ID.
- In the AppVerifyDemo folder, click on Info.plist. It will open in the window to the right.
- Click Information Property List and go to the URL types section. Open the array to reveal the URL identifier.
- Add your apps Bundle Identifier string to the URL identifier value.
- Add a URL Schemes array beneath the URL Identifier and expand the array.
- Add your intended URL prefix string (usually added to the Item 0 key).
- Open the DeepLinkManager.swift file within the Deep Linking folder.
- Make sure the
appVerifyHoststring matches the value you added to your URL schemes.
You can also take a look at the following areas of the app for implementation details:
- Deep Linking folder
- AppDelegate.swift (very bottom of the file)
Error handling
The sample app passes errors from the SMS request process between your server and Telesign directly back to the app. Additionally, some error handling is added to deal with problems that can occur from trying to authenticate with a JWT token. Depending on what way you want to authenticate your end user to your servers, your error handling will vary.
You can review how error handling is dealt with in the Helper Classes folder in the TSError.swift file.
Updated 2 months ago