
Flow Builder - Run, test, and validate a flow
NOTE:Select regional availability. This feature is currently available for customers with end users in select countries. To find out if this feature is available in your region, contact a Telesign expert.
This product is available for full-service accounts only.
After you have created and activated a flow, you need to run the flow as well as test and validate it.
Before you begin
Before you start, make sure you have the following:
- An activated a flow and its request JSON.
- An API test client, such as Postman. This is what you'll use to make the API requests. If you don't have one, you'll need to create an account and install the application.
- Access to the API documentation for both the token generation and flow initialization APIs. You'll need this to find the necessary URLs, headers, and other details. These can be found on these pages:
Running Your transactional flow
After you've designed and activated your flow in the portal platform, follow these steps to run it using the API.
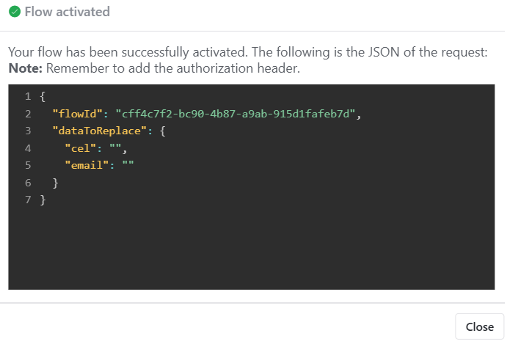
Step 1: Copy the request JSON
When you activate your flow on the platform, a window will appear displaying the request body in JSON format. Copy this entire JSON object to your clipboard. You'll use this as the body for your second API request.
Step 2: Generate a bearer token
Before you can initialize your flow, you need to obtain an authorization token.
-
Open your API test client.
-
Create a new request for the token generation API.
-
Refer to the API documentation to configure the request correctly. This will include:
- URL: The endpoint for the token API.
- Method: The HTTP method (e.g., POST).
- Headers: Any required headers, such as Content-Type or Authorization.
- Body: The request body, if needed.
-
Send the request. The response will contain a bearer token. Copy this token; you'll need it for the next step.
Step 3: Initialize the Flow
Now, use the token you just generated and the JSON you copied from the platform to initialize the flow.
-
In your API test client, create a new request for the flow initialization API.
-
Refer to the API documentation to configure this request. You will need to specify the following:
- URL: The endpoint for the flow API.
- Method: The HTTP method (e.g., POST).
- Headers: Add a header named Authorization and set its value to Bearer <your_token>. Be sure to replace <your_token> with the token you copied in Step 2.
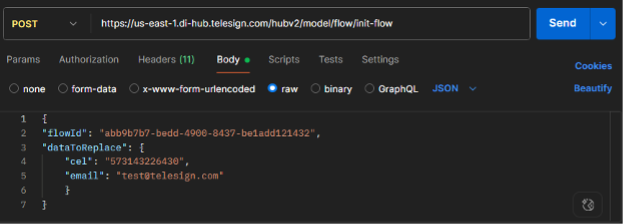
- Body: Paste the JSON you copied in Step 1.
-
Send the request. The API test client will display a response confirming the flow's status. If successful, you will see a response similar to this screenshot.
Step 4: Validate the Response
Once you send your request, the API will return a response that indicates if the process was successful.
Success: A successful request will return a 200 HTTP status and a body confirming that the flow has been initialized.
Error: If the request fails, the API will return a different HTTP status code (e.g., 400, 401, 404, or 500) and a detailed error message in the response body. To troubleshoot, refer to the reference pages for a complete list and description of all possible error conditions and messages.
Once completed, your flows are ready to use.
Updated 4 months ago